Know the hip thrust
The Hip Thrust isn't just a muscle-building exercise; it plays a crucial role in improving your posture and preventing injury. Learning how to do it correctly is therefore essential to reap all the benefits, while avoiding common mistakes that could compromise your progress.
What is Hip Thrust?
The Hip Thrust is an exercise muscle strengthening which mainly targets glutes. Originating in the world of bodybuilding and popularized by fitness trainers and athletes, this exercise has become a must-have for anyone looking to improve their strength and fitness.
This movement involves a extension of hip dynamic, usually performed in a lying position, with the shoulders supported on a bench or stable surface. Its effectiveness in activating the gluteal muscles makes it essential for any muscle strengthening routine, especially for those who aim to improve their sports performance or simply sculpt their figure.
Why the Hip Thrust is essential for your workout
The Hip Thrust is essential not only for develop muscle volume glutes, but also for improve posture overall. By strengthening the gluteus maximus, this exercise helps stabilize hips and reduce the risk of injuries in daily life and sporting activities.
In the context of power sports, such as sprinting or jumping, the Hip Thrust makes a significant contribution to explosive capacity. Athletes who incorporate this exercise into their training often see improvements in their performance, thanks to better propulsive strength.
For those who don't necessarily practise sport, the Hip Thrust helps to counteract the harmful effects of a sedentary lifestyle, which can lead to weakness in the posterior chain muscles, accentuating the risk of back pain and muscular imbalances. So incorporating the Hip Thrust into your training routines ensures you maintain a solid muscular base and optimal posture.
Muscles used during the hip thrust
THE gluteus maximus is the star of the Hip Thrust. He is the most bulky and the most powerful of the gluteal muscles, and its main role is hip extension. When you perform a hip thrust, the gluteus maximus works intensely to lift the hips upwards, allowing you to sculpt effectively this area of the body.
In addition, the hamstrings also play a crucial role. Located at the back of the thighs, they assist the gluteus maximus in the hip extension movement. By strengthening the hamstrings, you can not only improve your power but also reduce the risk of injury, as these muscles are often neglected in traditional workouts.
THE lower back, where the lumbar muscles, also acts as a stabilizer during the execution of the Hip Thrust. Although their role is less direct in the extension movement, they are essential for maintaining correct and safe posture throughout the exercise.
Muscle functioning during the Hip Thrust
The mechanics of Hip Thrust are based on dynamic extension of the hip, where several muscle groups interact in a synchronized manner. The gluteus maximus, as the prime mover, pushes the hips upward. Meanwhile, the hamstrings provide complementary strength to support this movement.
The interaction between these muscles is crucial to safe, effective execution. The hamstrings, working in tandem with the gluteus maximus, allow for an efficient and safe exercise. powerful climb And controlledThe muscles of the lower back ensure that the spine remains aligned and protected against stress and injury.
By understanding these dynamics, you can not only optimize the performance of your Hip Thrusts, but also avoid common mistakes that could compromise your muscle gains or your safety. Each repetition should be performed with particular care to properly engage these muscle groups, ensuring the best results while preserving your body.
Basic Hip Thrust Technique
Initial positioning for an effective Hip Thrust is crucial. Start by sitting on the floor with your back against a stable bench or platform at knee height. Feet should be placed flat on the floor, hip-width apart. Make sure the bench is sturdy enough to support your weight and movements.
Back positioning is also essential: your shoulder blades should rest on the bench, allowing you to create a stable pivot for the movement of your hips. This position helps to maximise gluteal engagement while protecting your spine.
The optimal knee angle should be around 90 degrees when your hips are lifted. This allows maximum activation of the glutes and hamstrings while minimising pressure on the knees. Make sure your feet remain firmly planted on the ground throughout the exercise for added stability.
Execution of the movement
When climbing, focus on the contraction from your glutes to lift your hips toward the ceiling. Your body should form a straight line from shoulders to knees at the highest position. It is important to breathe correctly: inhale before starting the lift and exhale as you rise. This breathing technique will help you stabilize your core and maximize the force applied.
The movement should be fluid and controlled. Avoid swinging your hips or using momentum to climb. The ascent should be strictly due to the strength of your gluteal and hamstring muscles, ensuring that you are working the right muscle groups effectively.
The descent is just as important as the climb. Control the movement by slowly lowering your hips toward the floor. Don't just let your body fall; maintain tension in your glutes and hamstrings throughout the descent. This helps increase time under muscle tension, which is crucial for building strength and mass.
Briefly reset your position on the floor before beginning the next repetition. Make sure your posture remains intact and you're ready to optimally re-engage your muscles for the next climb.
By following these steps and maintaining rigorous technique, you maximize the benefits of Hip Thrust while minimizing the risk of injury. Each repetition must be performed with precision to ensure that you get the most out of this powerful and transformative exercise.
Variations of the Hip Thrust
Hip Thrust with Equipment
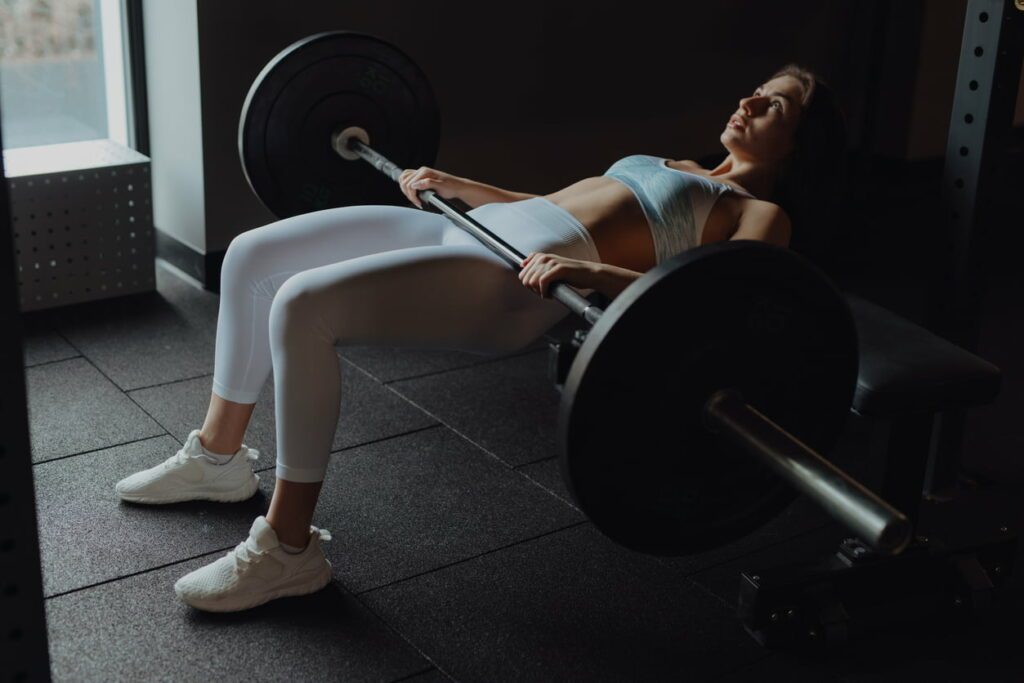
The Hip Thrust with rod is a popular variant that allows you toincrease there resistance and D'intensify training. To perform this version, place a bar loaded with weights suited to your level of strength just above your hips. Use a cushion or specific protection for the bar to prevent any pain or injury to the pelvis.
When performing the movement, make sure the bar remains stable and the weight is evenly distributed on both sides. The lift should be performed by pushing the feet firmly into the ground, contracting the glutes to elevate the hips. The descent should be controlled, maintaining tension in the targeted muscles.
Advice on adjusting loads is essential: start with a light weight and gradually increase as your strength improves. This avoids injury and ensures that your technique remains correct despite the increased load.
Hip Thrust to the ground
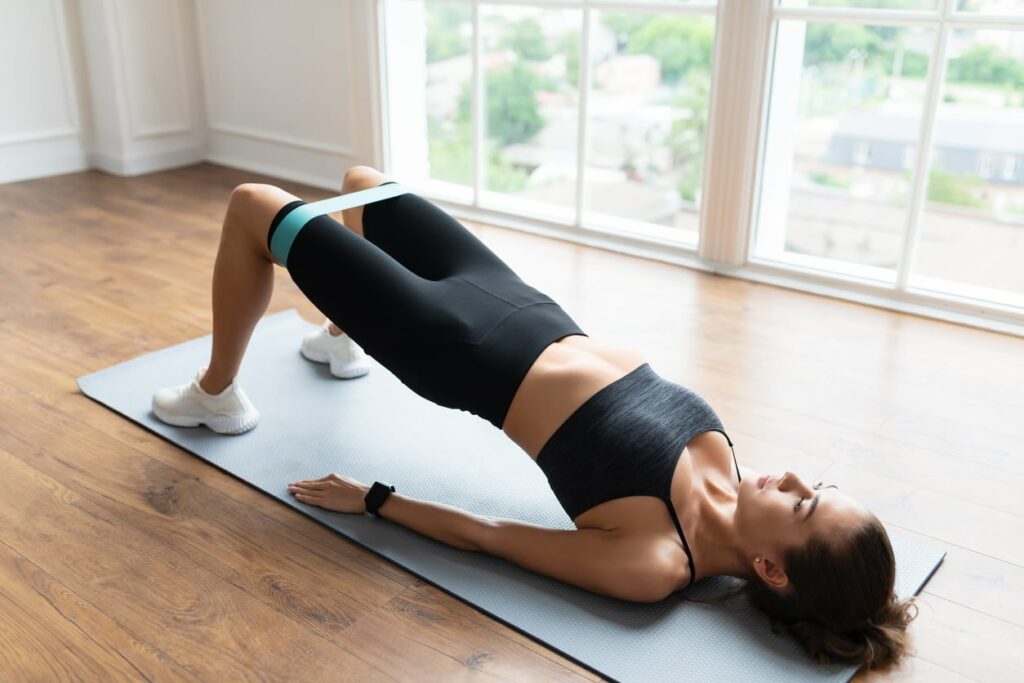
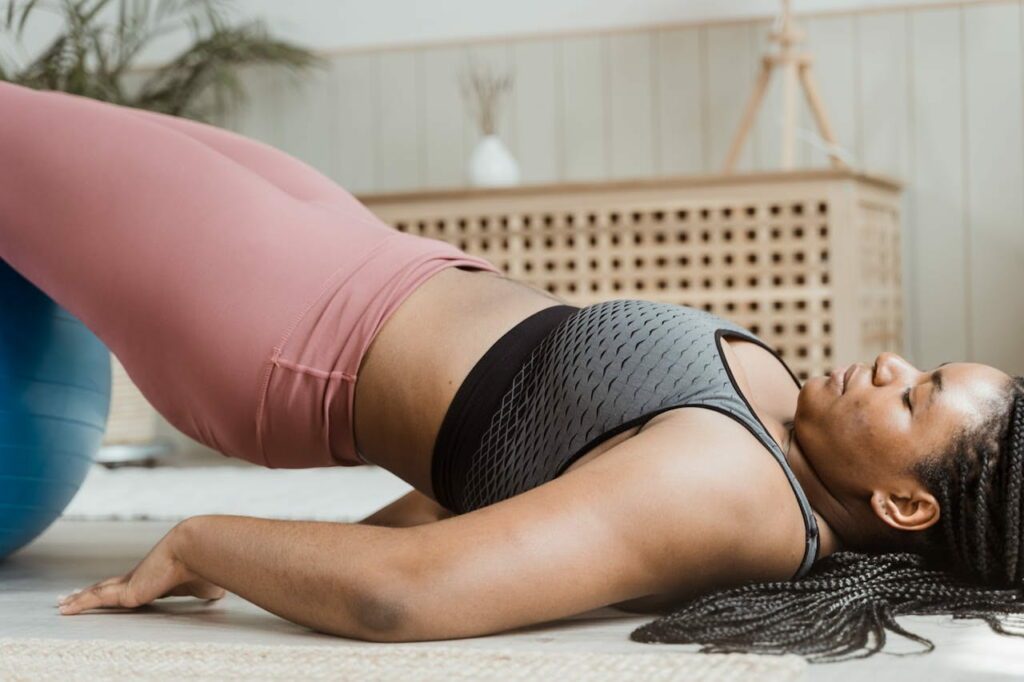
The Hip Thrust on the floor, or Glute Bridge, is an excellent alternative for those who don't have access to a bench or who are new to this exercise. For this variation, lie on your back with your feet flat on the floor and your knees bent. Your arms should rest at your sides, and your palms can touch the floor for added stability.
The focus here is on theRaising the hips towards the ceiling by contracting the buttocks, without the aid of a bench to support the shoulders. This version puts slightly less pressure on the lower back, making it a good option for those who may feel discomfort with the standard bench version.
The advantages of this variant include its simplicity and accessibility, as no specialist equipment is required. However, it is important to note that precautions are still necessary, particularly with regard to technique to avoid excessive strain on the neck or lower back.
By exploring these variations of the Hip Thrust, you can not only add variety to your training routine, but also tailor the exercise to your specific needs and training environment. Each of these options offers unique benefits and allows you to target the gluteal and hip muscles in slightly different ways, contributing to complete and balanced muscle development.
Progress and starting weight
For beginners, it's crucial to start the Hip Thrust with a weight that allows you to maintain good technique throughout the exercise. Initially, you could even consider practising the movement without weights in order to familiarise yourself with the correct form. Once you've mastered the basic technique, you can gradually introduce lighter weights.
Using a light barbell or even bodyweight at the start helps you to concentrate on the correct activation of the gluteal muscles without risking overloading the back or other muscles that are not the main objective of this exercise. The choice of initial weight should be such that you can perform around 10 to 15 repetitions without compromising form.
Progress
Once performing the Hip Thrust with an initial weight becomes comfortable and you can complete the sets without tiring prematurely, it's time to gradually increase the load. Increasing the weight gradually is essential to continue stimulating the muscles and promoting muscle growth and strength.
Progression can also include increasing the number of reps per set or adding more challenging variations, such as the unilateral hip thrust (one foot at a time) for extra challenge. It is recommended to increase the weight from 5% to 10% as soon as you can complete two full sets at the current intensity without reducing the quality of the form.
Recommended frequency and number of repetitions
To obtain good results, practice the Hip Thrust 2 to 3 times a week. This allows adequate rest time between sessions, essential for muscle recovery and injury prevention. As for the number of repetitions, a good starting point is to perform 3 to 4 sets of 10 to 15 repetitions.
The key is to listen to your body: if you feel any pain other than the usual muscle fatigue, re-evaluate your technique and the weight you're using. Following these guidelines will help you maximise the effectiveness of your exercise while minimising the risk of injury.
Common Mistakes and How to Avoid Them
The most common mistakes when practising the Hip Thrust include excessive lifting of the load, compromising form, and lack of control during the descent phase. To avoid these, always ensure that the movement is guided by gluteal strength and not momentum. In addition, avoid raising the hips beyond the body's natural alignment so as not to put strain on the lower back.
By following these guidelines, you can build a solid foundation for integrating the Hip Thrust into your training routine, ensuring safe and effective progression.
Practical tips for optimizing Hip Thrust
To maximise the effectiveness of the Hip Thrust and guarantee the best possible gains, here are a few key tips to incorporate into your practice:
Isometric contraction: At the height of the ascent, hold a contraction of the buttocks for 1 to 2 seconds before coming back down. This isometric pause increases the intensity of the exercise and further strengthens the targeted muscles.
Engagement of the abdominal core: Keep your core active throughout the exercise to stabilise your lower back and increase the transmission of force through your hips. This also helps to protect your spine.
Proper breathing: Breathe deeply before lifting and exhale as you push your hips up. Good breathing helps to stabilise the core and maximise power during the effort.
Feet well positioned: Keep your feet flat on the floor, shoulder-width apart and pointed slightly outwards. This position encourages better activation of the buttocks and greater stability.
Specific warm-up: Before you begin your Hip Thrust set, perform a focused warm-up that includes hip mobility moves and light exercises to activate the glutes, like glute bridges or quadruped hip extensions.
Integration into your training routine
To reap the full benefits of the Hip Thrust, it is important to incorporate it wisely into your training routine:
Combination with other exercises : Incorporate the Hip Thrust into a circuit that also targets other muscle groups for a balanced workout. For example, combine it with squats, deadlifts and presses for a complete lower-body workout.
Planning a typical session : Start your workout with exercises that require greater neuromuscular activation, such as squats or deadlifts, and finish with the Hip Thrust to specifically target the glutes when they are already pre-activated.
Training frequency and volume : To progress, the Hip Thrust must be practised regularly. Include it 2 or 3 times a week, adjusting the volume and intensity according to your level of fatigue and overall recovery.
Tracking progress: Make a note of the weight used, the number of repetitions and sets, and how you feel during the exercise, so that you can gradually adjust your training and continue to make progress.
By following these practical tips, you can not only improve the performance of your Hip Thrust but also maximize the benefits for your physical development and general well-being.
Conclusion
The Hip Thrust is a fundamental exercise for effectively strengthening the glutes and improving posture. Its correct technique, including the positioning of the back and feet, maximises muscle activation while minimising the risk of injury. Thanks to the different variations presented, you can adapt the exercise to your level and environment, using equipment or opting for simpler methods on the floor.
To progress, adjust the weight and frequency of training according to your abilities, avoiding common errors for safe practice. Tips like isometric contraction and proper breathing are key to increased efficiency.
Build muscle at DRIP
Push back your limits and focus on improving your muscular strength with our HIIT or HYROX training has DRIP ! Join us for sessions of 50 minutes full of intensity.
At DRIP, you'll be immersed in a dynamic environment right from the start, with seven workshops divided into three series to turn every moment into a captivating challenge. Our energetic coaches will guide you to the rhythm of memorable playlists. Accessible to all levels, DRIP offers the ideal environment to sculpt your legs effectively. You'll love hating us! ❤️🔥